TL;DR
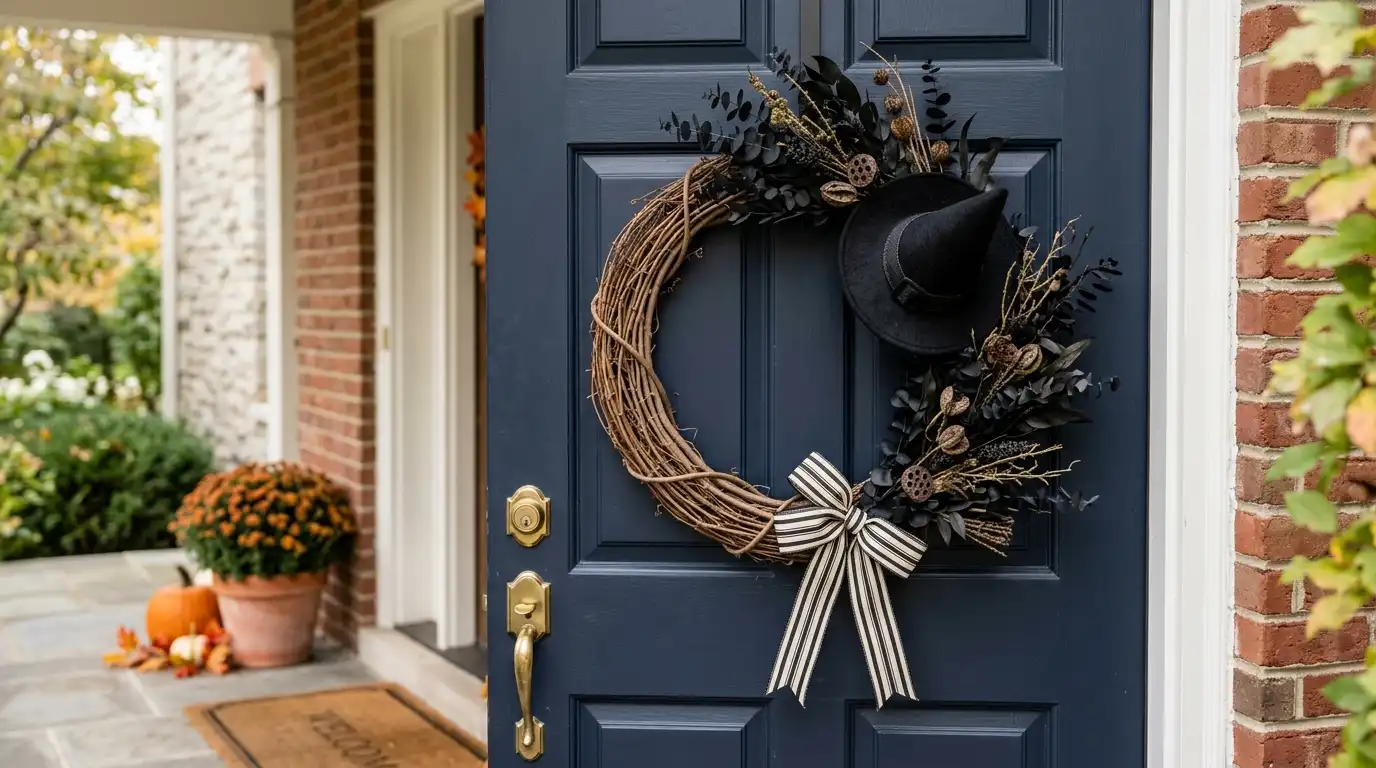
- Halloween is the one wreath worth making yourself — the store markup is on the prop, and the prop is the easy part.
- Build around one object, cap the whole wreath at five materials, and leave a third of the base bare.
- Wire anything heavier than a ribbon; save glue for light, flat pieces.
- Budget about $25-$45 in supplies against $60-$90 for a comparable store wreath.
My First One Looked Like a Craft-Fair Accident
For my first DIY Halloween wreath, I did what the kits teach: cover everything. Spider rings, foam pumpkins, a glitter banner, two kinds of mesh — eleven separate things on one ring. Two hours later it looked exactly like what it was, a pile of craft supplies wearing a circle. The store wreath I had been copying used four materials and one ghost.
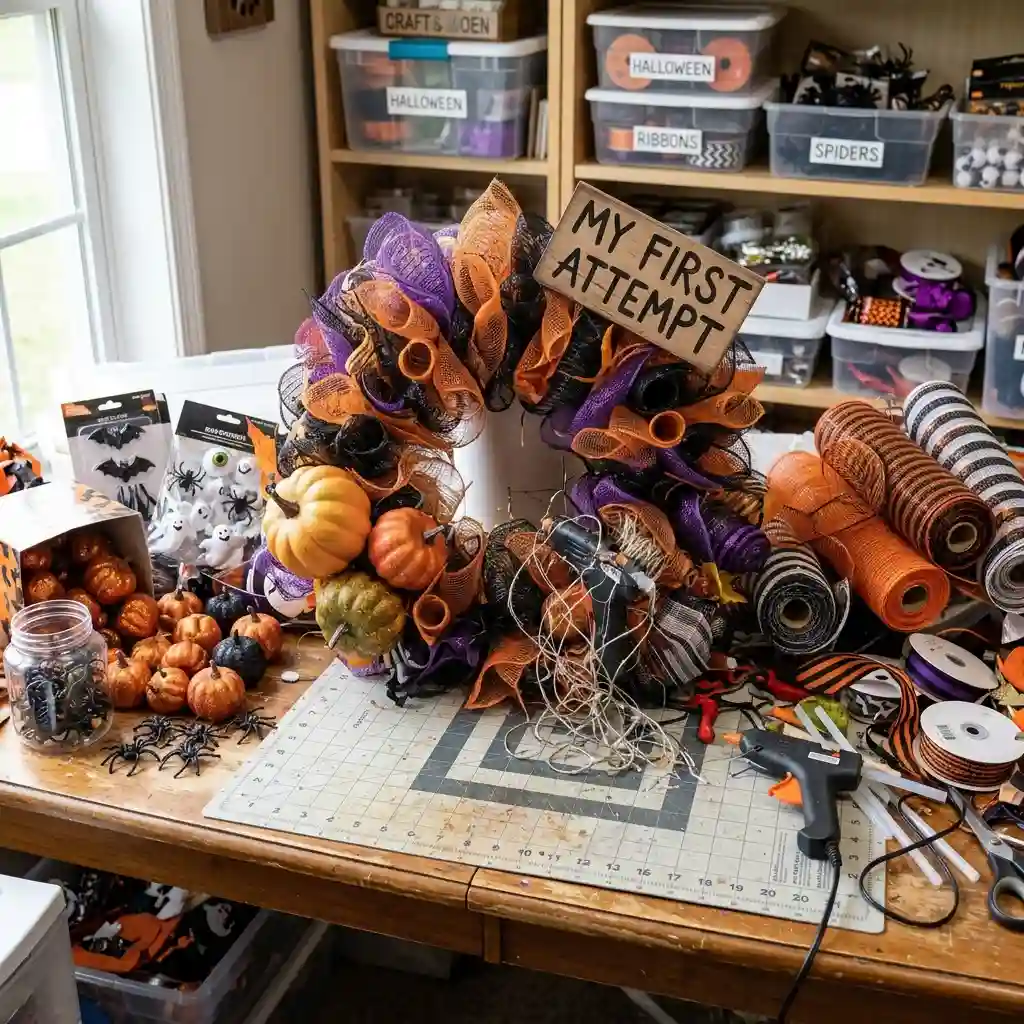
That gap is not about skill. A DIY Halloween wreath looks store-bought when it is built like a prop display: one object doing the scaring, a handful of supporting materials, and visible bare base holding it all together. The build takes about an hour, costs $25-$45 in supplies, and needs no craft experience — just restraint and floral wire.
This tutorial covers the whole thing: the short supply list, the six build steps, a no-glue version kids can help with, and the shortcuts that give a homemade wreath away. It slots in alongside the rest of our Halloween decorating ideas as the one page where you build instead of buy.
What You’ll Need
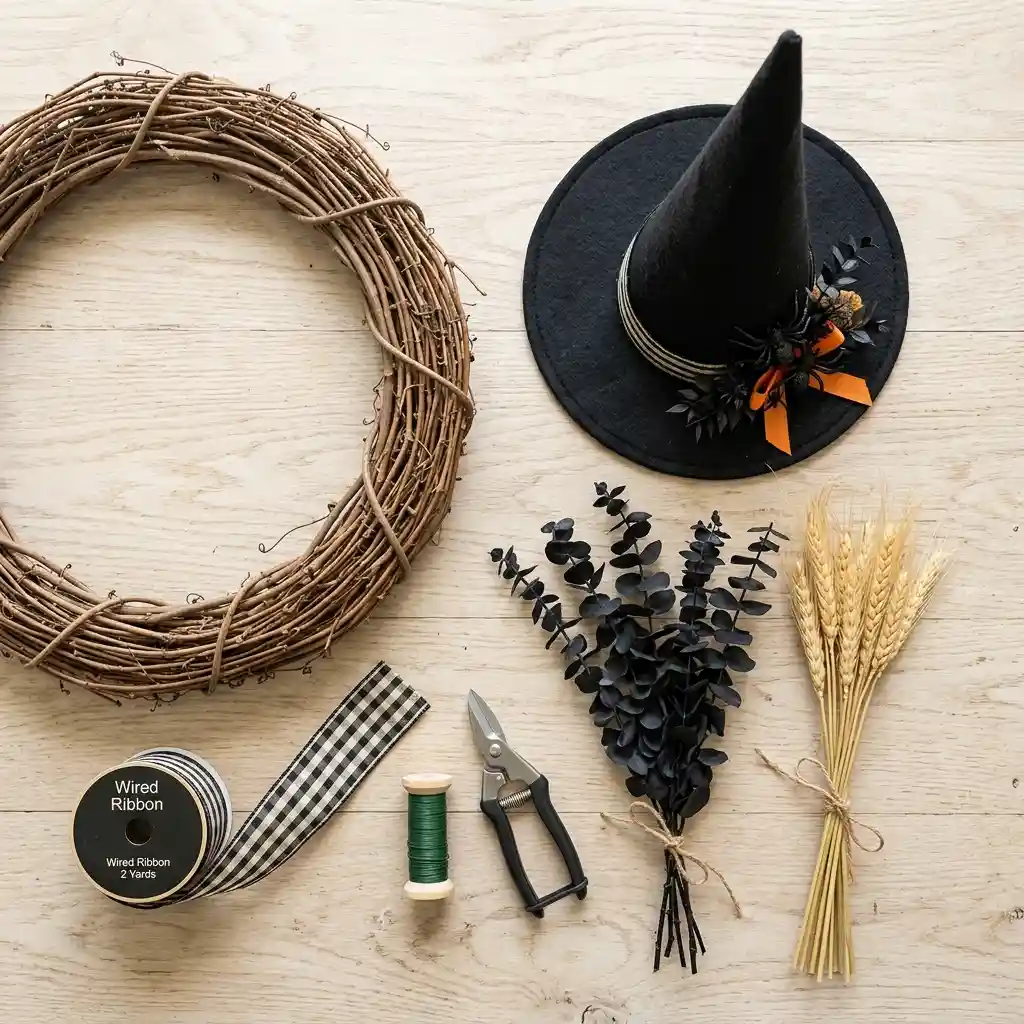
The list is shorter than any kit suggests. Everything here comes from one craft-store trip or one online order:
- An 18-inch grapevine wreath base — the workhorse size for standard doors, and the texture that makes bare sections look styled instead of unfinished.
- One roll of floral wire, plus wire snips.
- One prop — a witch hat, a fabric ghost, a skeleton hand, a small sign. One.
- Two to three stem materials: black-dyed eucalyptus, dried wheat, faux branches, or picks in your palette.
- About 2 yards of wired ribbon for a bow and a hanging loop.
- A glue gun, for light flat pieces only.
Skip the foam ring the kits push. Foam needs full coverage to look finished, which triples your material cost and your build time. Grapevine looks good at one-third coverage, which is the whole trick of this build.
Why the DIY Halloween Wreath Is Having a Moment
Store wreath prices explain most of it. A designer-style Halloween wreath with a single hat or ghost runs $60-$90 at seasonal retailers, and the markup is not on materials — it is on assembly you can do in an hour. The prop that makes the wreath is a $5-$15 purchase on its own. Halloween is also the season where props matter more than florals, and props are exactly where handmade competes evenly with manufactured. You can watch the same shift across our seasonal decorating guides — the handmade share of every holiday keeps growing.
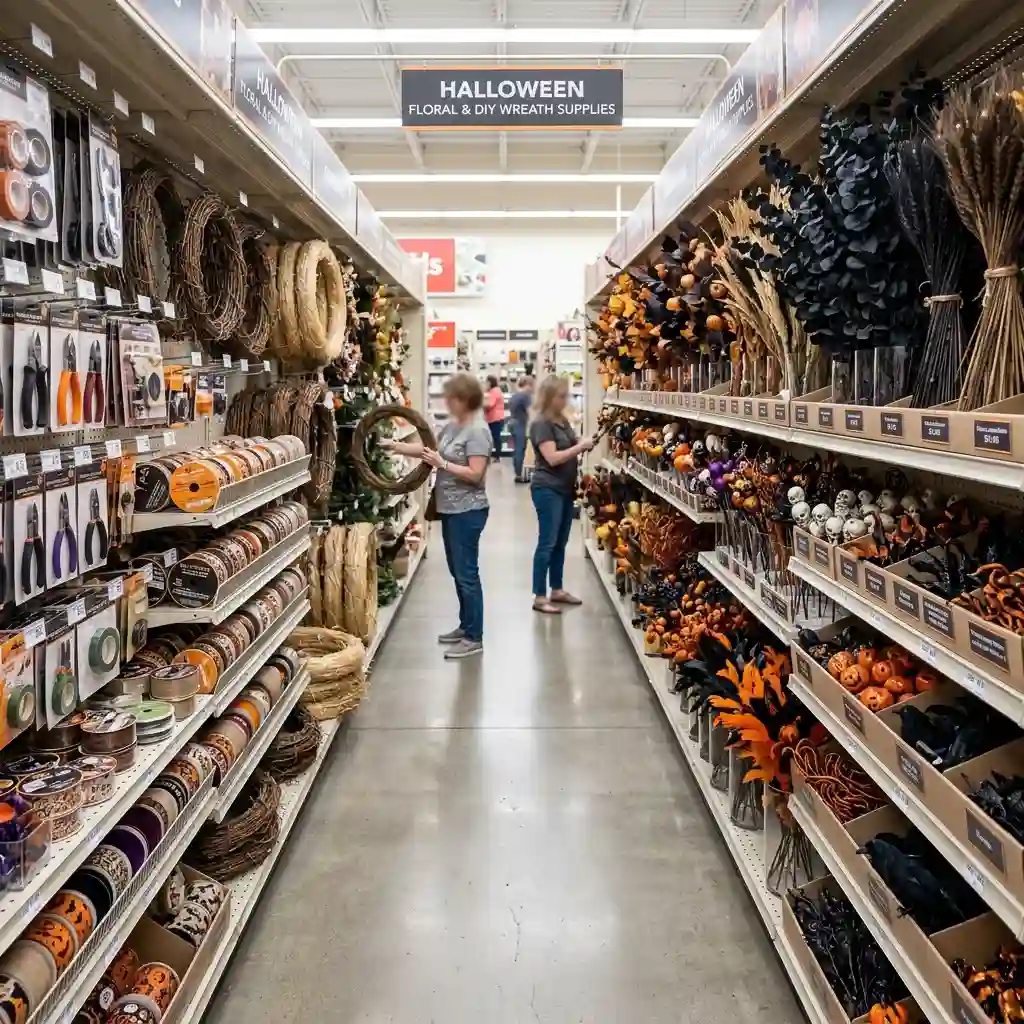
The demand shows in how people search. Phrases like “halloween wreath tutorial” and “halloween wreath diy easy” are established searches on Pinterest, which only happens when a project has moved from crafters into the mainstream. Our own DIY decorating projects follow the same pattern — the projects that stick are the ones with a real price gap over retail.
Signs This Is Catching On:
- Craft retailers keep widening their Halloween pick-and-stem walls each season — a section that barely existed a decade ago now rivals the fall floral aisle.
- Tutorial-format wreath searches are established terms on Pinterest rather than seasonal spikes, the mark of a project with a repeat audience.
- Ready-made prop wreaths keep climbing in price while their components — hats, ghosts, signs — stay cheap and easy to find separately.
Why Does a Homemade Wreath Look Homemade?
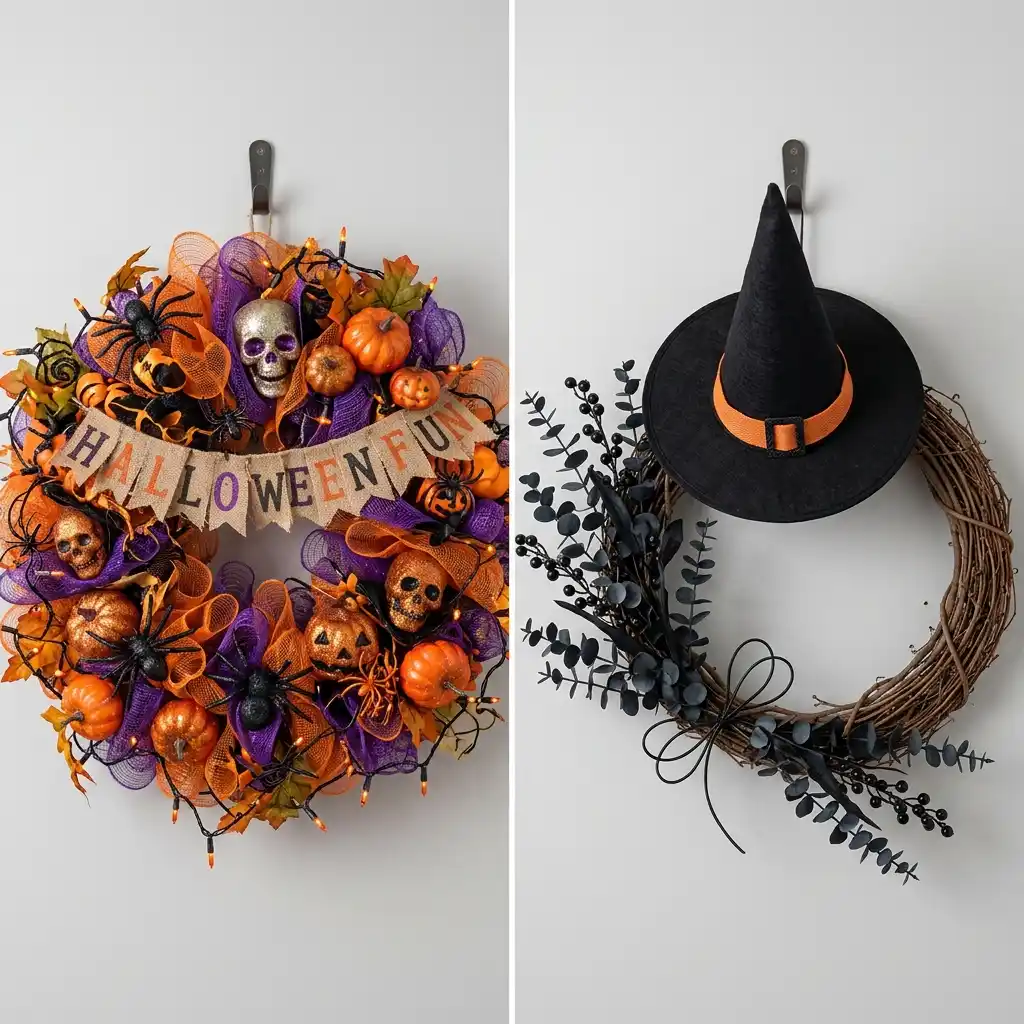
Most homemade Halloween wreaths fail the same way: addition. Every trip past the craft aisle adds one more thing, and each addition dilutes the last one. Ten small props compete; one prop commands. A wreath with a witch hat, three spiders, a banner, and glitter picks has no focal point — it has an argument.
Store wreaths win on subtraction. Count the materials on any $80 wreath and you will usually find five or fewer, repeated and grouped, with bare base showing between them. So steal the two rules that matter. First: one object does the scaring — everything else supports it. Second: five materials maximum, counting the base, the stems, the ribbon, and the prop. Under those two caps, it is genuinely hard to build an ugly wreath.
KEY TAKEAWAY: The difference between homemade-looking and store-bought is not craft skill — it is one prop instead of ten and five materials instead of fifteen.
How to Build It
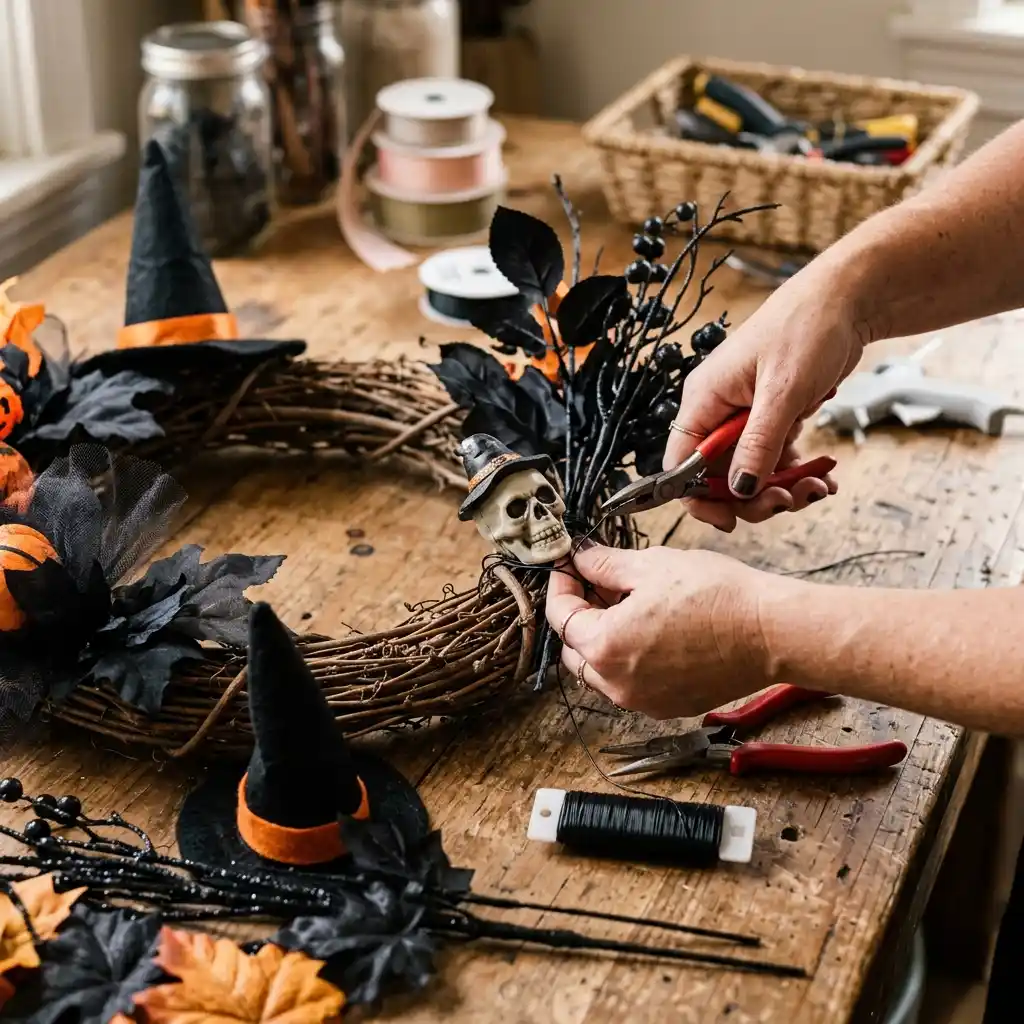
The six steps below run in strict order — prep, prop, anchor, fill, finish, check. Total working time is about an hour the first time, closer to thirty minutes once you have done it twice. Do the layout on a table, not on the door.
Step 1 — Prep the Base
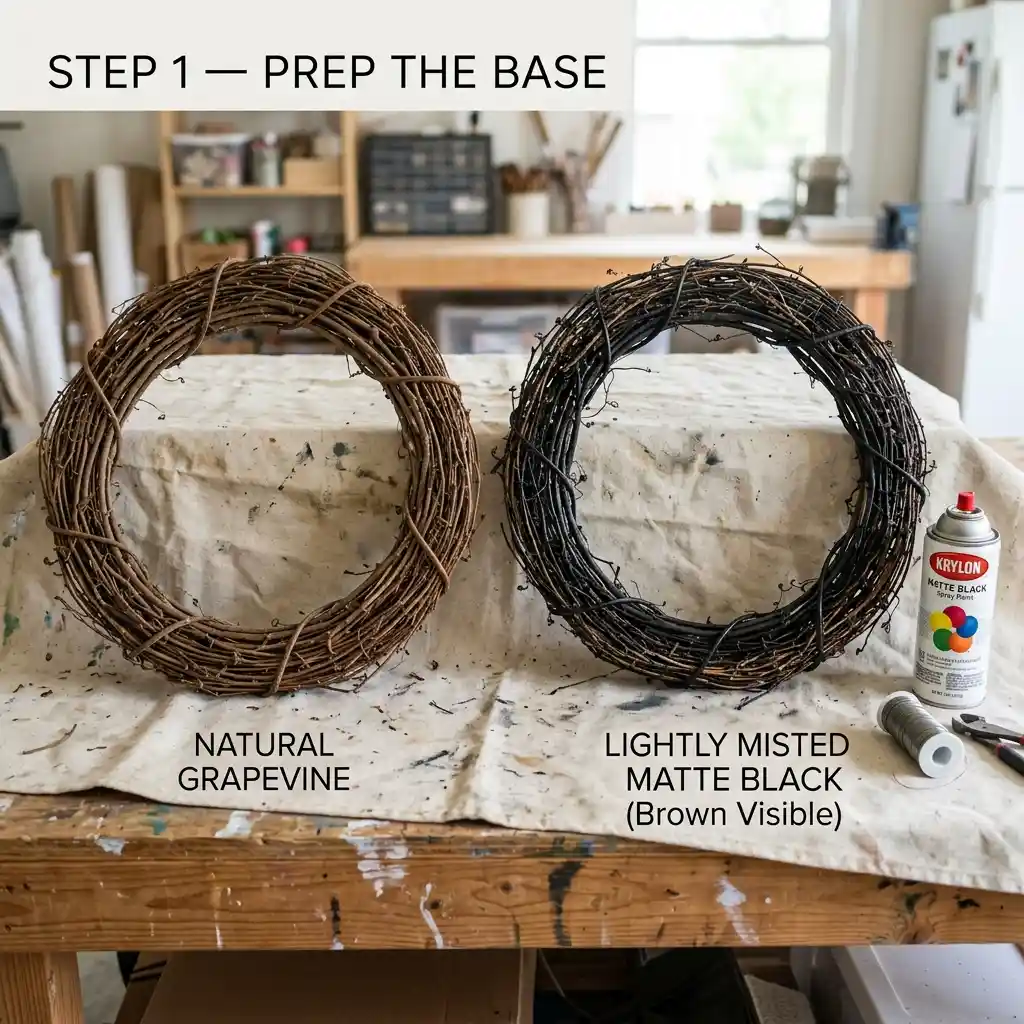
Decide the base’s color before anything touches it. Natural grapevine leans harvest and works if your palette is orange, cream, and wheat. For a spookier build, mist the ring with matte black spray paint and let it dry for an hour — a blacked-out base reads as a bought Halloween wreath before a single stem goes on. Use matte only; gloss looks like plastic. Designer Tip: mist rather than soak — a light overspray that lets flecks of brown vine show through passes for an aged, bought base, while solid black coverage flattens the texture that makes grapevine worth using. Tie your hanging loop of ribbon or wire onto the ring now, while it is bare, and mark the top. Every later decision depends on knowing which way is up.
Step 2 — Choose the One Prop
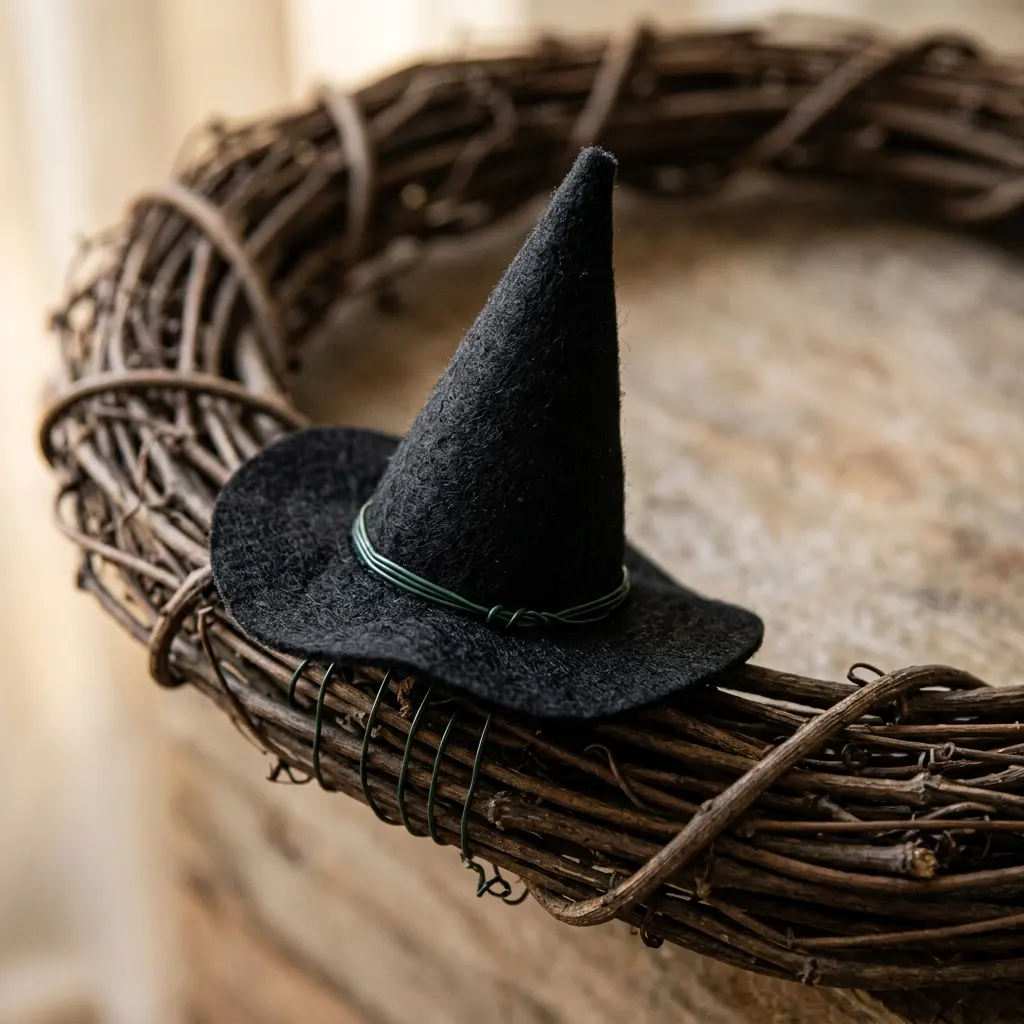
Pick the single object the wreath is about: a witch hat, a fabric ghost, a skeleton hand, a mini sign, an oversized eyeball. One is the number — the whole build collapses back into craft-fair territory at two. Weight matters more than looks here. Hold the prop in one hand; if it has real heft or an awkward shape, plan on wiring it at two points in the next step. Hollow and fabric props are the easiest to mount and the most forgiving. Position it off-center, roughly where 4 or 8 would sit on a clock face — centered props look like a target, off-center ones look styled.
Step 3 — Wire the Prop at Two Points
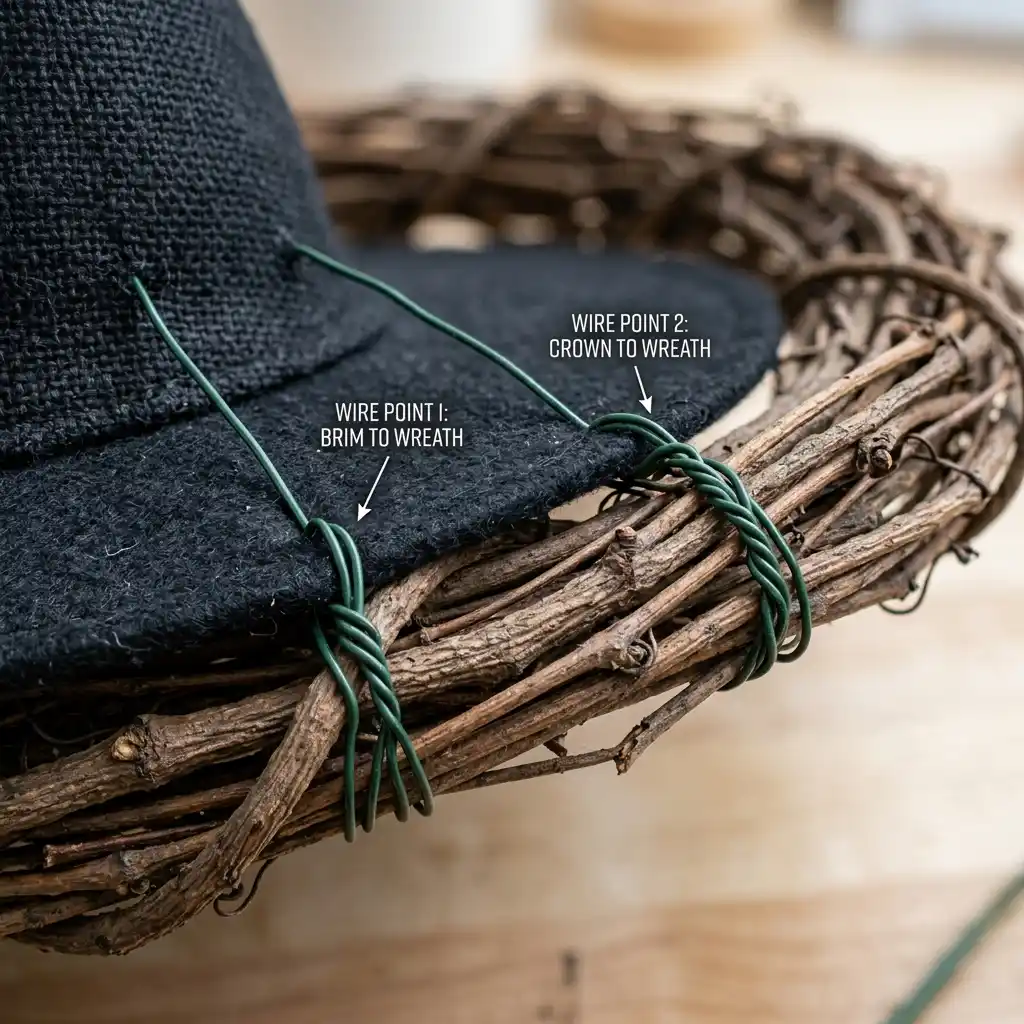
Anything heavier than a ribbon gets wired, never glued. Thread floral wire through or around the prop at two separate spots — brim and crown on a hat, wrist and finger on a skeleton hand — and twist each tail tight through the grapevine, tucking the sharp ends into the ring. Two anchor points stop the slow rotation that makes a wreath look defeated by week two. Material Note: hot glue bonds can loosen on a door that takes direct sun, and they let go completely in freezer-cold snaps, so glue is reserved for light, flat pieces that wind can’t grab. Give the wreath a firm shake before moving on. If the prop shifts, add a third wire.
Step 4 — Fill One Sweep, Not the Whole Ring
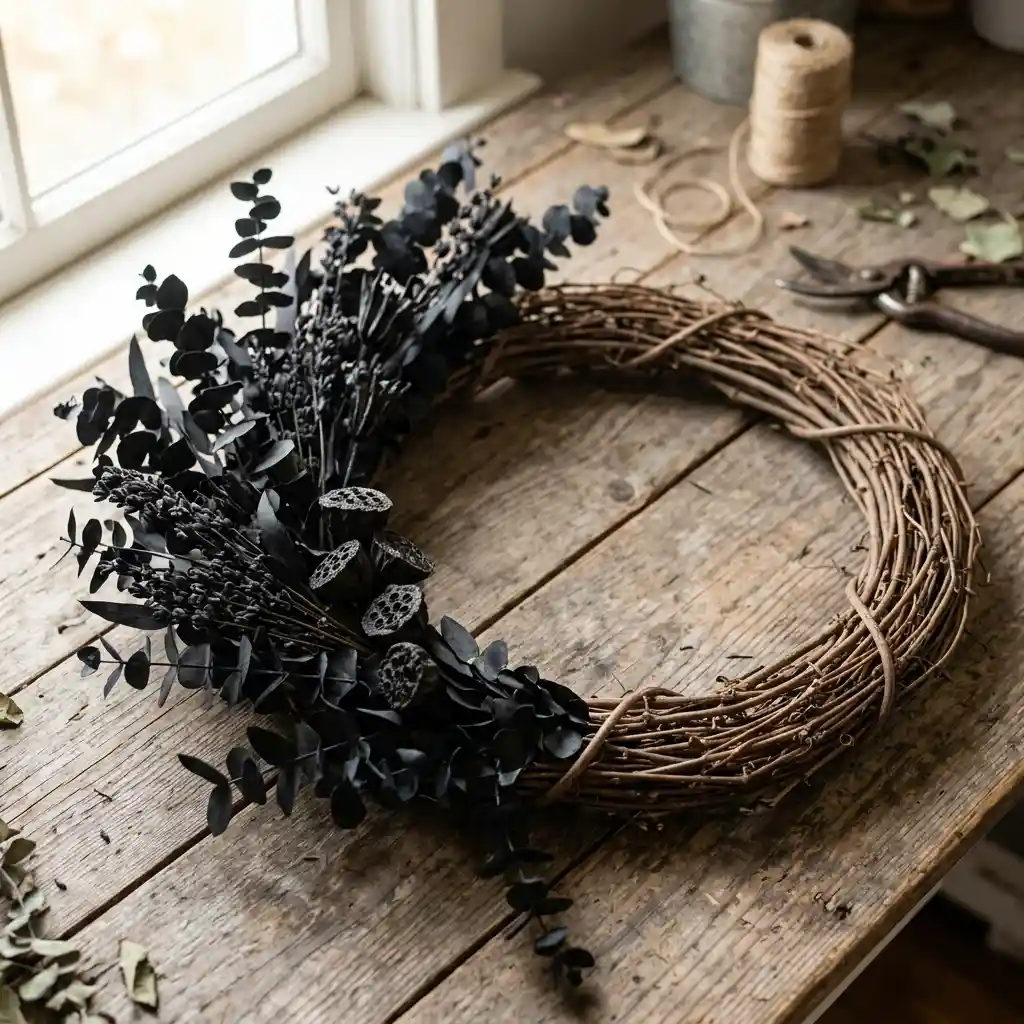
Add your two or three stem materials in a crescent that starts under the prop and sweeps a third to two-thirds of the way around the ring — then stop. Work in one direction, each bundle overlapping the stems of the last so every cut end disappears under the next layer. Tuck stems into the grapevine first; most will hold with no glue at all. The bare section is not unfinished — it is the part that makes a DIY Halloween wreath look intentional and store-priced. Full-circle coverage is the single most reliable homemade tell, and it doubles your material cost for a worse result.
Step 5 — Ribbon Last, and Only One
Ribbon is the finish, not the filler. Tie one bow in wired ribbon — it holds a shape fabric ribbon can’t — and place it where the crescent meets the bare base, covering your messiest wire work. Keep tails at 8 to 12 inches and trim the ends on a diagonal so they resist fraying. One bow is the cap; a second bow or trailing streamers on every side is another argument nobody wins. If your prop already carries pattern, like a striped witch hat, use solid ribbon in one of the wreath’s existing colors rather than adding a new one.
Step 6 — The Arm’s-Length Check
Hang the wreath on a wall or hold it at arm’s length and squint. You should see three things instantly: the prop, the sweep, the bare base. If anything else pulls your eye — a glue string, a wire tail, a stray pick — remove it now, because daylight on a door is less forgiving than your craft table. Check the back for wire ends that could scratch paint and pad them with a strip of felt. Then hang it and judge once more from the sidewalk; on dark doors especially, pale materials are what keep the shape visible from a distance. If the rest of the entry needs the same once-over, our front porch decor ideas cover the layers around the door.
| Quick Takeaways | |
|---|---|
| Base | An 18-inch grapevine ring, natural or matte black, is the whole foundation. |
| Prop | One object only, wired at two points, placed off-center. |
| Materials | Five maximum, counting base, stems, ribbon, and prop. |
| Coverage | Fill a one-third to two-thirds crescent and leave the rest bare. |
| Attachment | Wire anything with weight; glue only light, flat pieces. |
| Ribbon | One wired bow, tails 8-12 inches, covering the wire work. |
| Cost | $25-$45 in supplies against $60-$90 for the store version. |
The 20-Minute No-Glue Version
Skip the glue gun entirely and this becomes a project a seven-year-old can help with. Buy the base, one soft prop like a fabric ghost or plush spider, one bundle of picks, and a spool of black pipe cleaners. Everything attaches by twisting: pipe cleaners hold the prop, picks push straight into the grapevine, and the ribbon ties on. Safety Note: a hot glue gun’s nozzle and fresh glue can burn small fingers badly, so the twist-only build is the right version for kids — save any gluing for after they’ve gone to bed.
The result is also fully reversible. In November, untwist everything, and the same base takes dried wheat and cream ribbon for Thanksgiving — the approach behind most of our fall and autumn decor ideas is exactly this kind of base-reuse. One ring can carry three holidays a year.
The Shortcuts That Show
Instead of covering every inch of the base, leave a third of it bare — visible grapevine is precisely what the $80 wreaths are charging for.
Instead of hot-gluing the witch hat, wire it at two points — glue quietly lets go in October sun and you find the hat in the shrubs.
Instead of five small props, commit to one at a clock-face 4 or 8 — five props cost more and every one of them shrinks the others.
Instead of mixing glitter foam with plastic toys and mesh, cap the build at five materials — the cap costs nothing and does more than any upgrade.
Instead of leaving wire tails and glue strings for later, clear them at the arm’s-length check — they are invisible on the table and glaring on the door.
What You’ll Spend on Supplies
Every tier below beats the $60-$90 store wreath it imitates, and the tools carry over to every project after this one.
| Project | Estimated Cost | Impact Level |
|---|---|---|
| 18-inch grapevine base plus floral wire | $10-$18 | Very High |
| The single prop — witch hat, fabric ghost, skeleton hand, or sign | $5-$25 | High |
| Two to three stem or pick materials in one palette | $12-$30 | High |
| Wired ribbon, 2 yards | $6-$15 | Medium |
| One-time tools: glue gun, wire snips, matte black spray | $15-$35 | Medium |
Best First Upgrade: spend on the prop, not the stems — one convincing object carries the whole wreath, and it is the piece people notice from the walkway.
Skip for Now: deco mesh and multi-ribbon packs. Both push you toward full coverage, which is the look this build exists to avoid.
Should You Make or Buy This Year?
For Halloween specifically, make it. The store’s advantage — professional floral work — barely applies to a holiday built on props, and the prop is a separate purchase either way. What you are really buying at $80 is one hour of assembly and some restraint, and both are free. The craft transfers, too: the wire-and-crescent method here is the same one behind felt flower projects, the DIY fall wreath that runs on the same base, and half the seasonal builds you will attempt after it.
Buy instead if your door needs a matched pair, if you want a specific licensed character, or if the season is already a week old — a wreath finished in November helps nobody. And if the making itself is what appeals, handmade seasonal work scales well beyond October; our felt Christmas decorations and spring front-door wreaths run on the same one-trip supply logic.
Designer’s Verdict: this is the rare project where homemade genuinely beats retail — same materials, a third of the price, and the restraint rules do the designing for you.
Before You Glue Anything
- Confirm the base is 18 inches and the hanging loop is tied on while the ring is still bare.
- Shake-test the wired prop; two anchor points minimum, three if it shifts.
- Count materials on the table — base, stems, ribbon, prop — and stop at five.
- Lay the crescent out flat and photograph it before attaching a single stem.
- Check the door side for wire ends and pad them with felt before hanging.