TL;DR
- Zoning: Separate your space into cutting, sewing, and pressing stations.
- Verticality: Use pegboards and wall-mounted racks to keep tools off the table.
- Visibility: Opt for clear acrylic bins to identify fabric and notions at a glance.
- Maintenance: Implement a “five-minute tidy” rule at the end of every session.
A sewing room often acts as the engine room of a creative home. However, between bolts of fabric and tiny spools of thread, it can quickly become overwhelming. The goal of workspace organization is to minimize “search time” and maximize “make time.” Whether you are carving out a corner in a spare bedroom or looking for creative small apartment ideas to fit a craft station into a living area, smart storage is your best tool.
Effective organization follows the same logic as other high-traffic zones in the house. Just as spring entryway decor ideas focus on clearing clutter at the door, a sewing room needs a “drop zone” for projects in progress. By applying professional storage hacks—similar to those used in modern basement living and storage ideas—you can ensure your hobby remains a joy rather than a chore.
Bookmark this guide for quick reference.
Key Takeaway: Productive workspaces rely on the “everything in its place” philosophy to reduce visual stress and physical clutter.
12 Sewing Room Organization Ideas
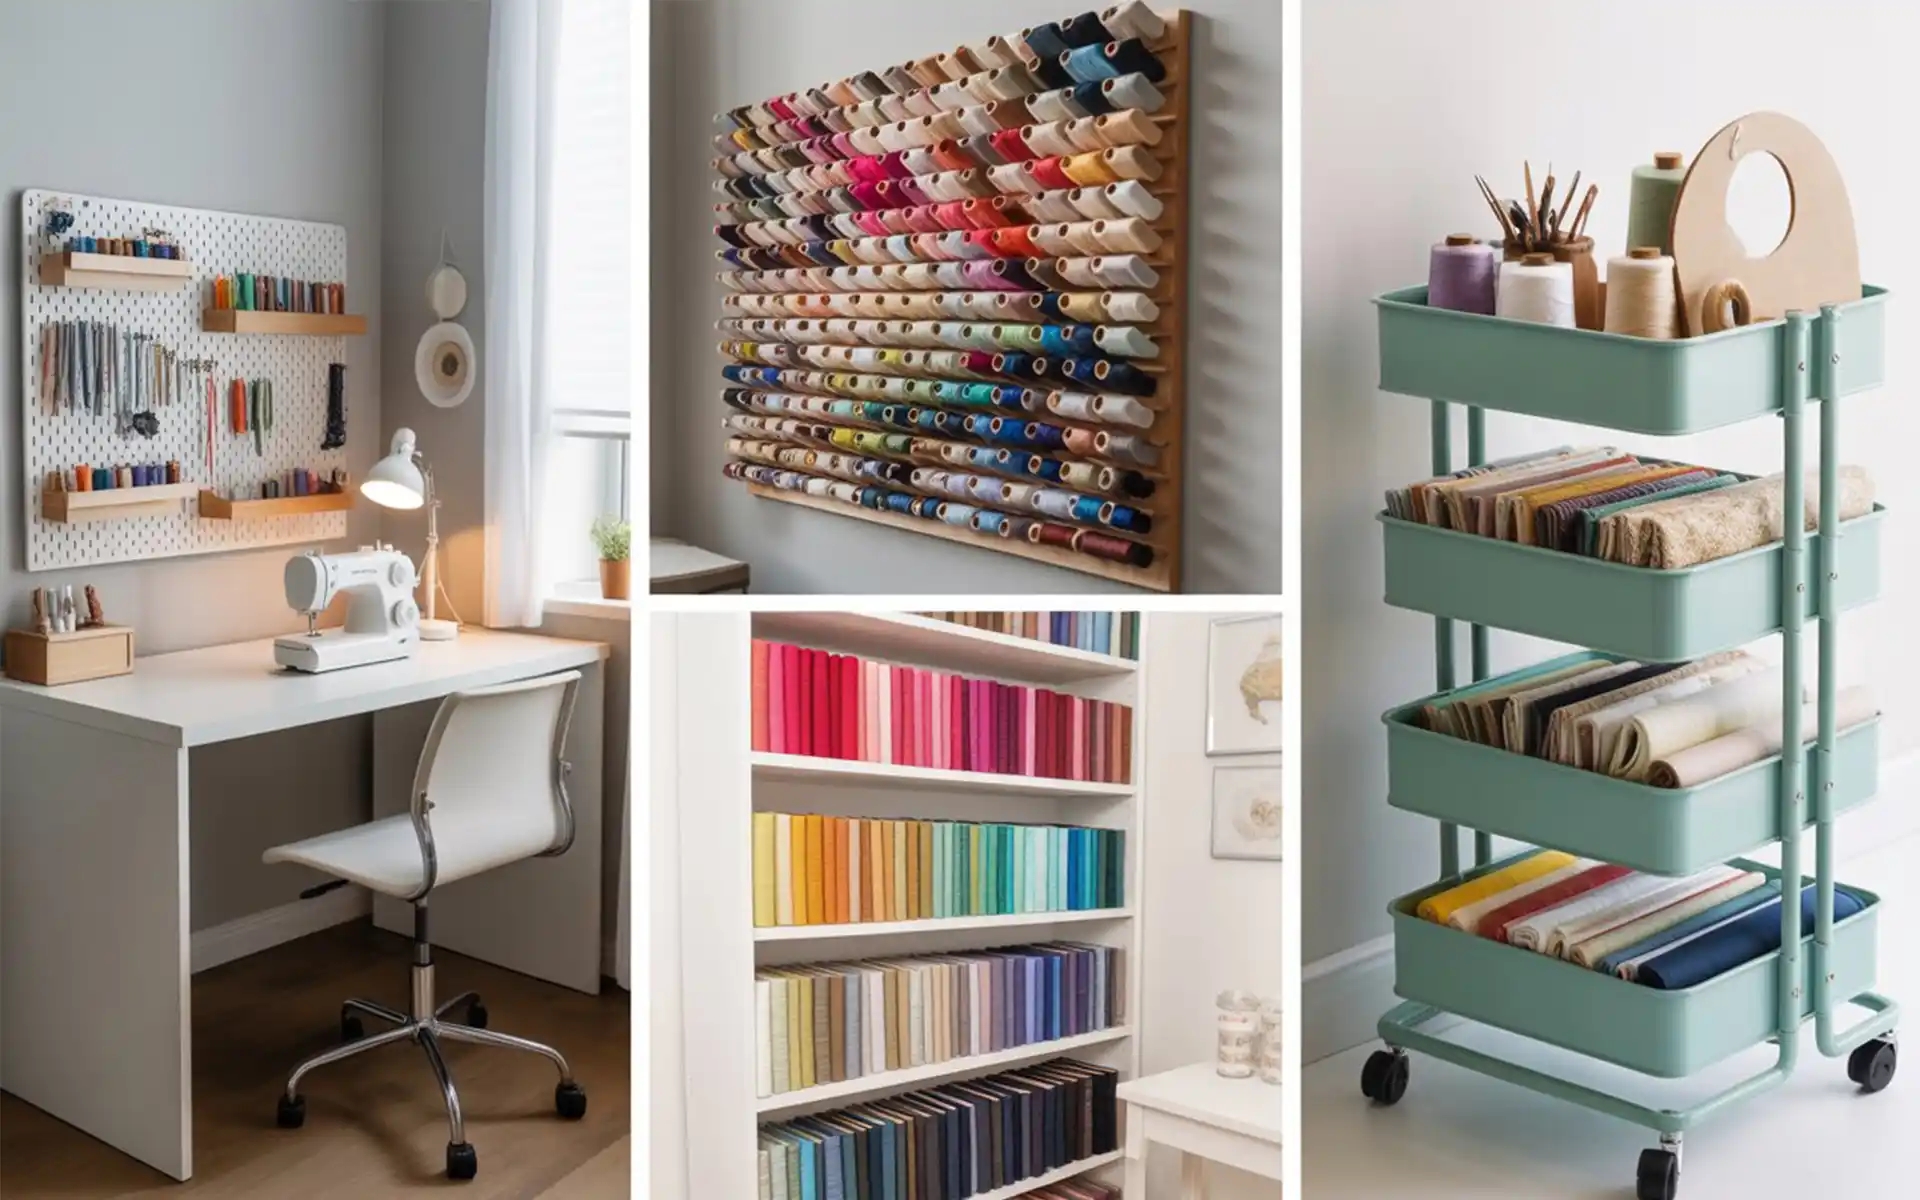
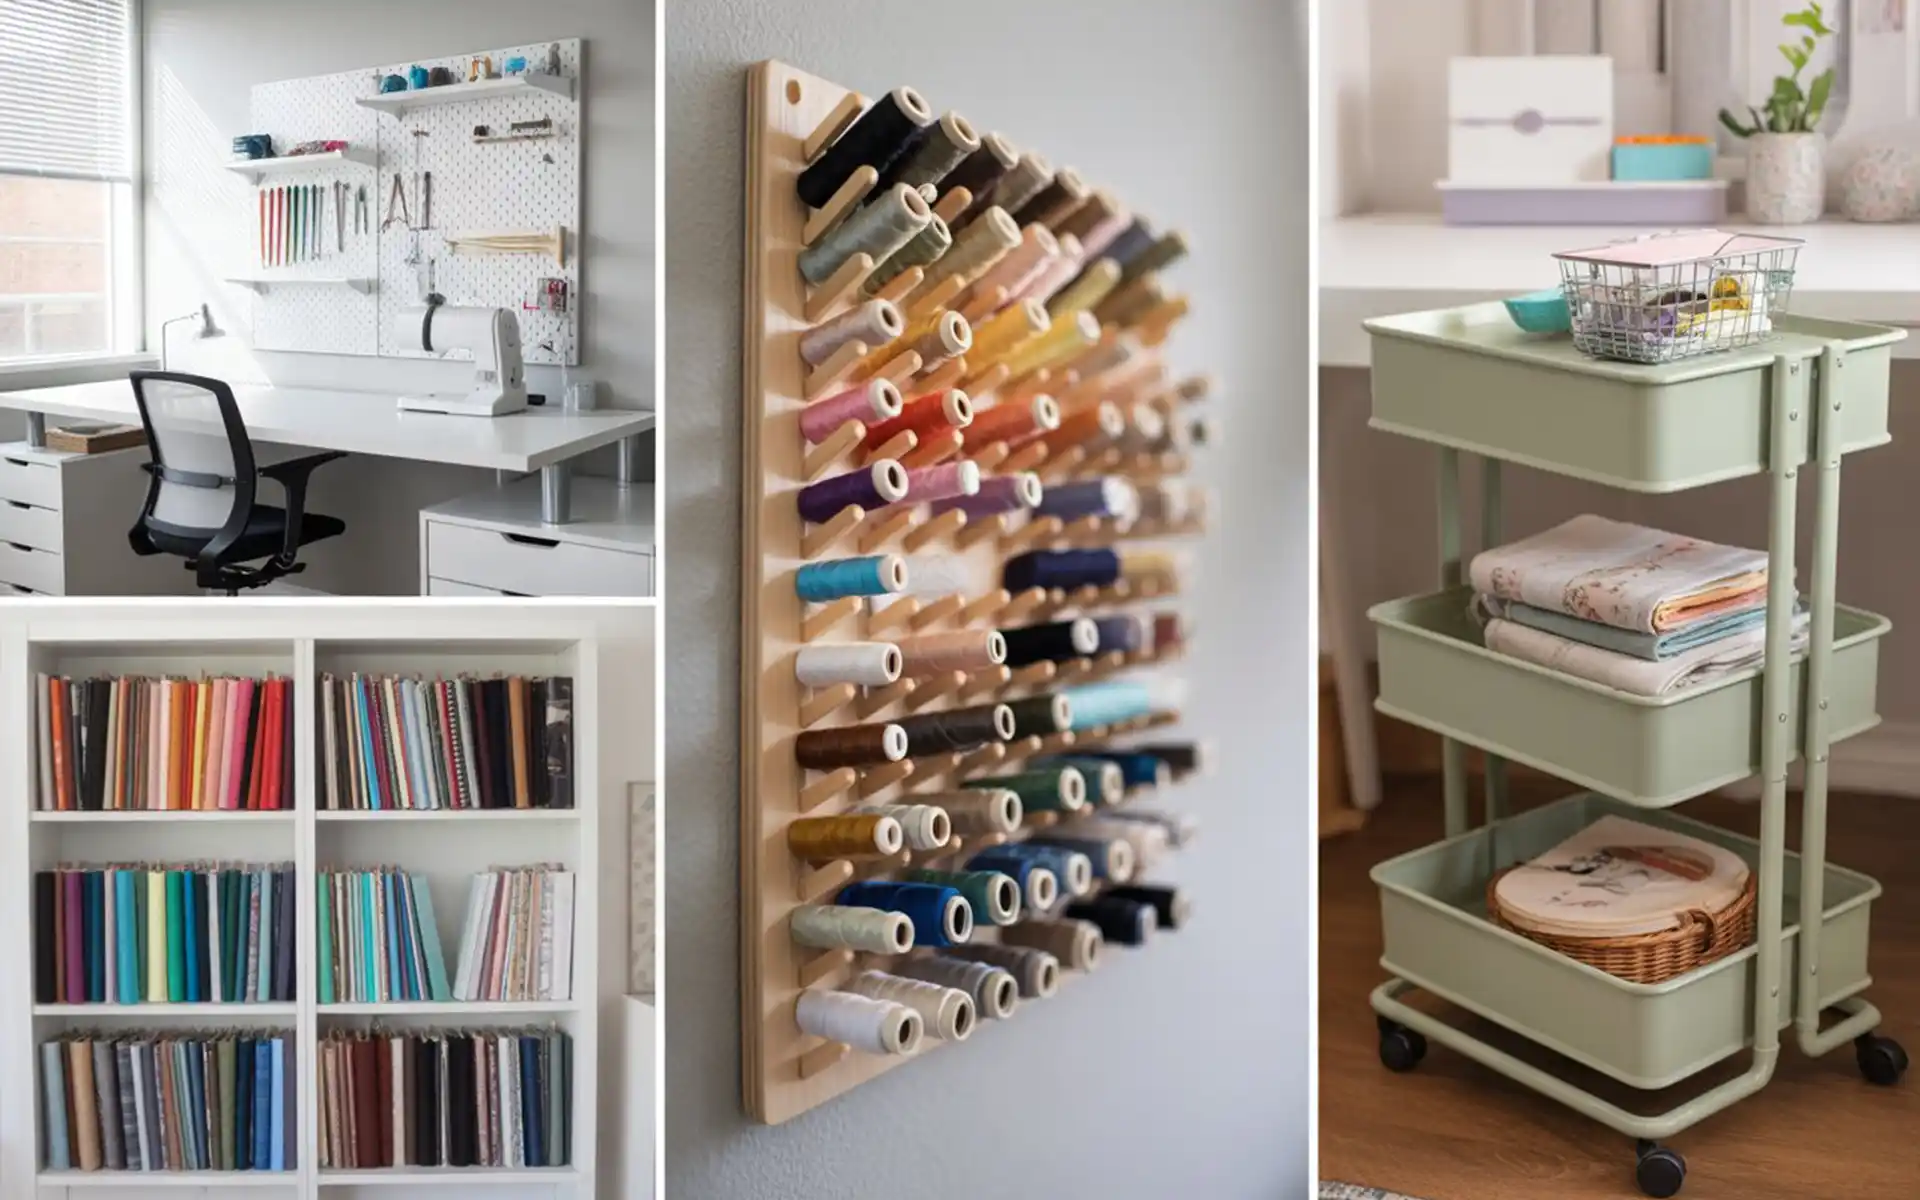
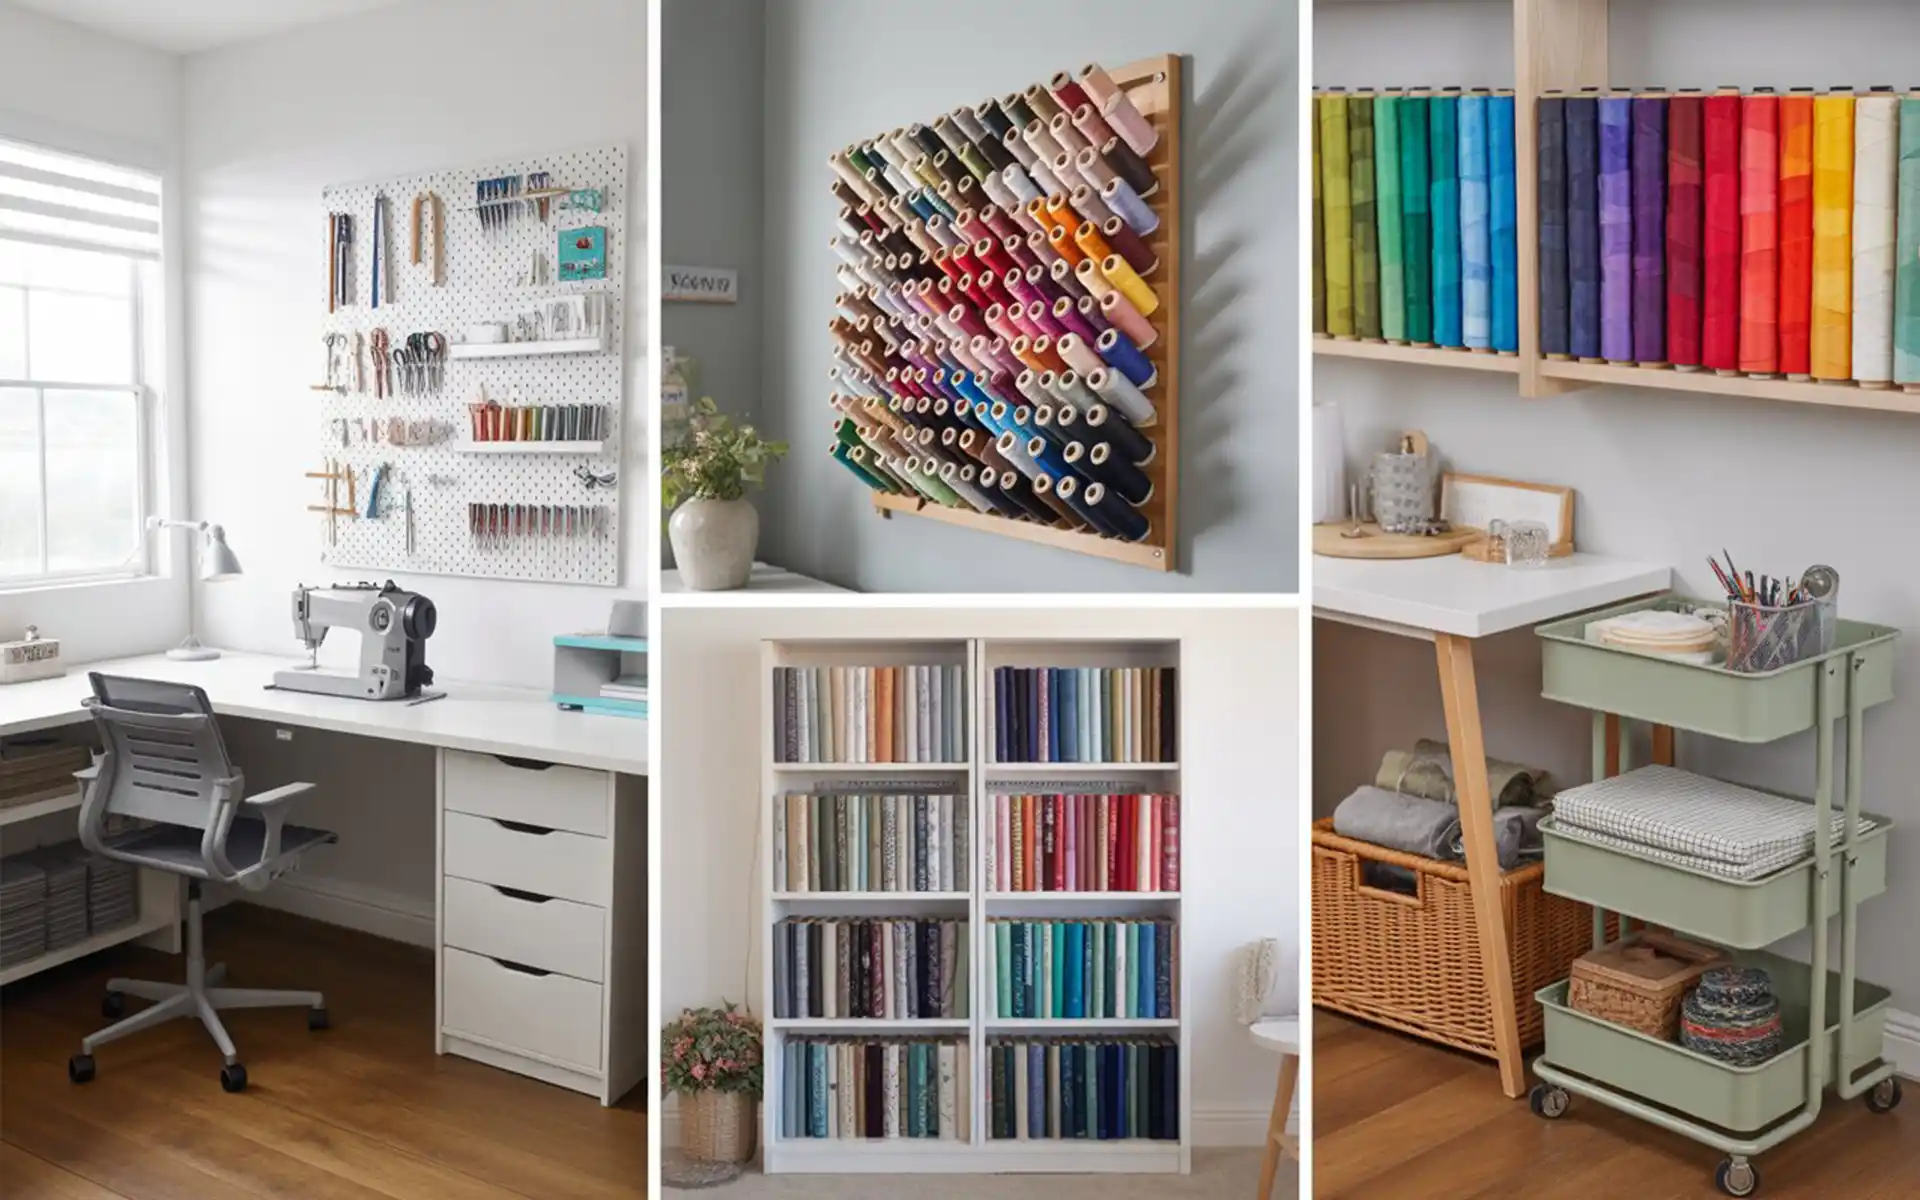
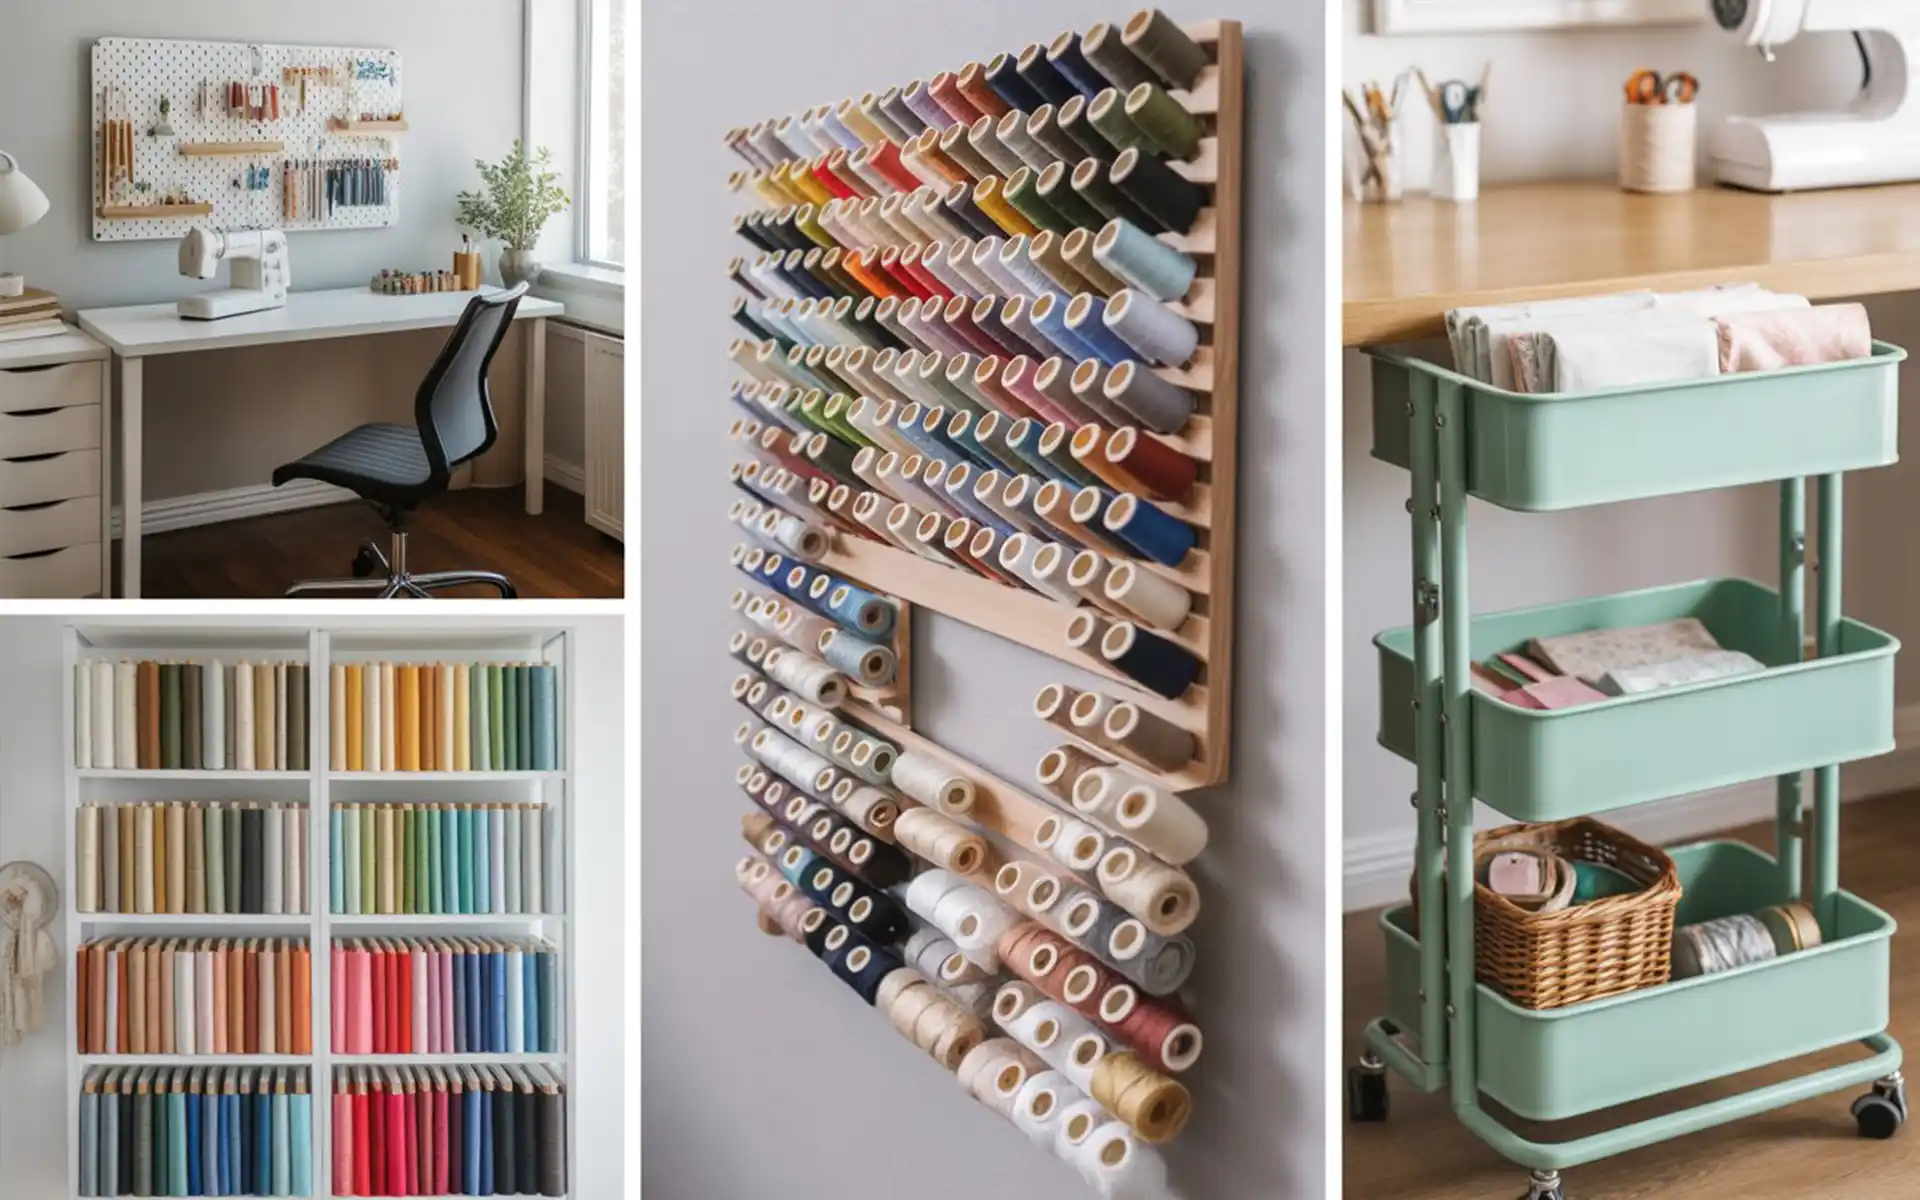
1. Wall-Mounted Pegboard System
A pegboard is the ultimate modular storage for sewists. Hang your fabric shears, rotary cutters, and rulers at eye level. This keeps your cutting mat clear and prevents sharp tools from getting buried under fabric scraps. You can even spray paint the board to match the soft tones of 15 grey bedroom design ideas for a sophisticated look.
2. Color-Coded Thread Racks
Storing thread on a wall-mounted rack prevents tangles and makes it easy to find the perfect match for your project. Arrange spools by color to create a vibrant piece of “functional art” on your wall, much like the creative spirit of wall-hanging craft ideas.
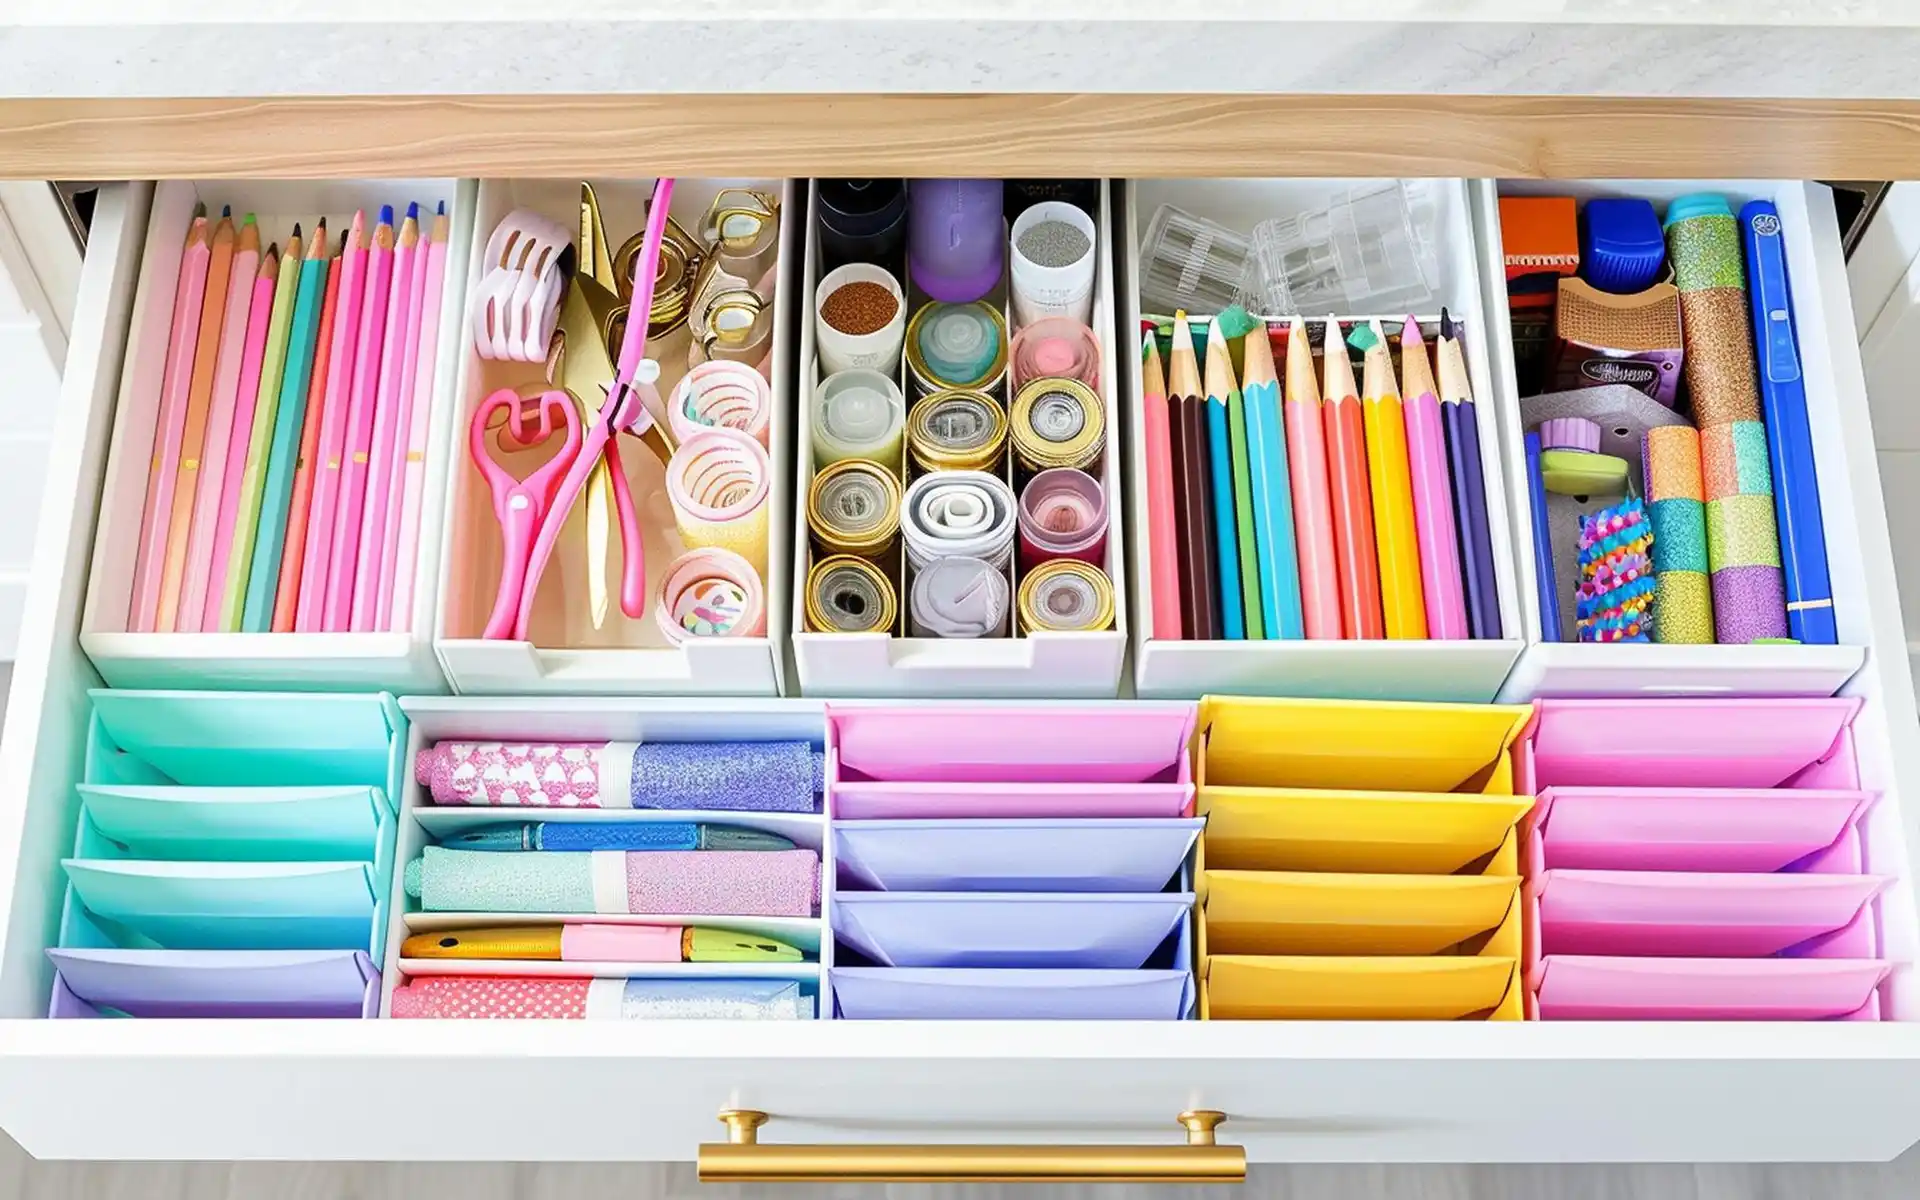
3. Clear Acrylic Notion Drawers
Small items like bobbins, safety pins, and buttons should be stored in clear, stackable drawers. Visibility is key; if you can see your supplies, you are less likely to buy duplicates. Label each drawer clearly for an extra layer of efficiency.
4. Uniform Fabric Folding
Use “comic book boards” or cardboard inserts to fold your fabric into uniform sizes. Storing these vertically on a bookshelf allows you to see every print in your stash without digging through a stack. This creates a “fabric library” that is both beautiful and practical.
Designer Tip: Group your fabric library by material type first (e.g., cotton, linen, knits), then by color, to speed up your selection process.
5. Magnetic Strip for Metal Tools
Install a magnetic knife strip near your sewing machine. It is perfect for catching pins, metal bobbins, and seam rippers. This prevents pins from rolling onto the floor and keeps your most-used small tools within arm’s reach.
6. Rolling Caddy for Projects
A three-tier rolling cart can hold all the components of a current “Project in Progress” (PIP). When you aren’t sewing, you can roll the cart into a closet or under a table, which is a great space-saving hack for those in a creative small apartment ideas setup.
7. The “Ironing Drawer” or Pull-out Board
In small rooms, a full-sized ironing board is a space killer. Install a wall-mounted fold-down board or a heavy-duty pressing mat on top of a low bookshelf. This ensures your pressing station is always ready without blocking the room.
8. Scissor Docking Station
Keep your fabric-only scissors separate from paper scissors by using a dedicated docking station or a labeled hook. This prevents accidental dulling of your expensive blades and ensures you always have the right tool for the job.
9. Under-Table Storage Bins
Utilize the space under your cutting table for large bins of batting or seasonal fabrics. Much like the storage solutions in man cave basement ideas, using the “hidden” floor space keeps the room feeling open and airy.
10. Ribbon and Trim Dispensers
Store ribbons and trims on a dowel or inside a repurposed sugar dispenser. This allows you to pull out exactly what you need without the entire spool unrolling. It keeps delicate trims clean and wrinkle-free.
11. Pattern Filing System
Don’t let paper patterns become a messy pile. Use a standard filing cabinet or a set of decorative binders with plastic sleeves to organize them by category (e.g., dresses, bags, kids). This mirrors the clean organization needed for cheap valentine day decorations diy templates.
12. Retractable Measuring Tape
Secure a retractable measuring tape to the edge of your cutting table. You will never have to hunt for a tape measure again, and it allows for quick checks as you work through your layout.
Key Takeaway: A productive sewing room relies on vertical storage and visibility to keep work surfaces clear and creative momentum high.
Designing for Workspace Ergonomics
Organization isn’t just about where things go; it’s about how you move in the space. Your sewing chair should be at a height that prevents neck strain, and your cutting table should ideally be at waist height. If your room is multi-functional, consider using the same cohesive colors found in bathroom backsplash ideas to tie the utility area in with the rest of your home’s decor.
If you find your sewing room gets too warm, look to private small courtyard ideas for inspiration on airflow and natural light. Large windows or a well-placed fan can make long hours at the machine much more comfortable.
Key Takeaway: Ergonomic placement of your sewing, cutting, and pressing stations prevents fatigue and long-term physical strain.
Common Sewing Room Mistakes to Avoid
- ❌ Storing Fabric in Direct Sunlight → ✅ Keep your fabric library away from windows to prevent fading over time.
- ❌ Overcrowding Your Sewing Surface → ✅ Keep only your machine and immediate tools on the table; move everything else to vertical racks.
- ❌ Using Opaque Storage Bins → ✅ If you use opaque bins, you must label them clearly on all sides so you don’t have to open them to see what’s inside.
- ❌ Neglecting Scrap Management → ✅ Keep a small “scrap bin” near your machine; once it’s full, sort them or donate them to avoid a floor-level “fabric mountain.”
Key Takeaway: Avoiding visual clutter and protecting your materials from light damage will keep your sewing room feeling professional and fresh.
Budget & Cost
Organizing your workspace can be done incrementally using household items and affordable modular systems.
| Project | Estimated Cost | Main Material |
|---|---|---|
| Pegboard System | $30 – $60 | Hardboard / Wood |
| Clear Acrylic Bins (Set) | $20 – $40 | Plastic |
| Rolling Utility Cart | $35 – $60 | Metal / Plastic |
| Magnetic Tool Strip | $10 – $20 | Magnet / Metal |
Key Takeaway: You can fully organize a sewing room for under $150 by focusing on high-impact items like pegboards and project carts.
Decisions & Layout Challenges
The biggest challenge in sewing room design is the “Triangle of Efficiency”—the distance between your machine, your cutting mat, and your iron. If these are too far apart, you waste energy. In a creative small apartment ideas scenario, you may need to use a “fold-away” approach where the iron and cutting mat are stored vertically when not in use.
Workspace Checklist
- Install “warm white” LED task lighting directly over the needle.
- Place a small trash bin within arm’s reach for thread tails.
- Use a comfortable, adjustable chair with back support.
- Ensure all electrical cords are tucked away safely.
Key Takeaway: Mapping out your workflow before buying furniture ensures your layout supports your physical movements.
FAQ’s
Conclusion
An efficient sewing room is a gift to your creative self. By clearing the clutter and organizing your supplies with visibility in mind, you create a workspace that invites you to sit down and start making. Whether you have a whole room or a small corner, these tips will help you stay productive and inspired.
Next Steps:
- Clear your main sewing table and only put back the essentials.
- Install a pegboard or magnetic strip for your most-used tools this weekend.
- Sort your fabric stash into a vertical “library” for better visibility.
- Set up a “pressing station” that doesn’t require a full-sized ironing board.